One of the core practices of the Kanban Method is to make process policies explicit. This helps team members and stakeholders understand what’s expected, thereby reducing confusion and enabling greater process consistency. Until the mechanism of a process is made explicit, it can be difficult to engage in meaningful discussion about how to improve it.
Without a common understanding of how the work should be done, discussions about problems tend to be emotional, anecdotal, and subjective. Making your policies explicit facilitates a more rational, empirical, and objective discussion of issues and how to increase the team’s effectiveness.
How to Make Process Policies Explicit in Planview AgilePlace
Planview AgilePlace provides a number of ways to help you capture, preserve, and share your team’s policy decisions, right within your kanban board:
- Provide a board description to communicate the purpose of your work.
- Design your board layout to reflect decision-making and workflow policies.
- Define explicit lane policies to establish when work is ready to be moved.
- Create legend cards to communicate additional information and instructions.
- Set WIP limits to constrain the amount of work flowing through the system.
- Establish class of service policies according to business risk and impact.
- Create board templates for consistent, repeatable processes.
- Use pre-defined taskcards to ensure consistent implementation.
Using these techniques, Planview AgilePlace empowers team members to determine the most effective way to keep work flowing through the system.
1. Board Description
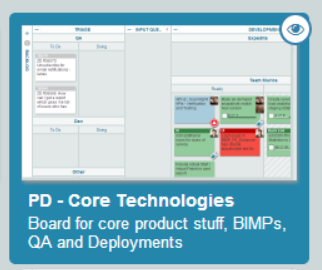
Clearly communicate the purpose of your work to other members in your organization by including a board description (available in the board Settings menu). This provides contextual information that helps others understand how the board is used. Learn how to update your board settings in Planview AgilePlace.
2. Board Layout
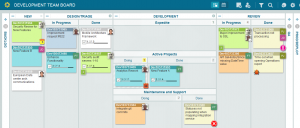
The way you design your board helps team members and stakeholders visualize how planning decisions are made and how work gets done. Modify the layout of your backlog to reflect your decision-making process for planning upcoming work. For example, you might have designated lanes to represent where work requests come from. Or, you might want to visualize a decision-making framework such as PDCA (Plan-Do-Check-Act) or SWOT (Strengths-Weaknesses-Opportunities-Threats) analysis.
As work is pulled onto the board, it’s important that the steps accurately reflect your team’s process. Planview AgilePlace’s flexible board editor lets you visually model any process, no matter how complex. Use vertical lanes to visualize each stage in your flow and horizontal swimlanes to represent parallel processes on the same board.
3. Lane Policies
Process policies are used to explain when a work item is ready to be moved into the next lane or sub-lane on the board. They help the team answer important questions, such as how the work queue is replenished and when a card can be moved into the next lane.

To manage lane policies in Planview AgilePlace, go to the Board Layout Editor and click the Settings icon on the header of the lane you want to add.
4. Legend Cards
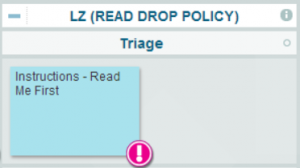
Adding legend cards to your board is another way to explicitly communicate information or instructions to your team. In this example, the IT services team uses a card to explain how new requests should be submitted.
5. WIP Limits
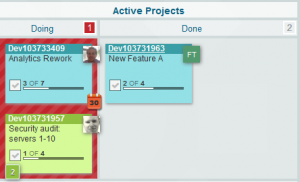
Setting work-in-process (WIP) limits in Planview AgilePlace enables your team to set policies on how much work can be applied to specific stages in your process (i.e., to lanes) or to individuals (i.e., to users). Visual indicators show when limits have been met or exceeded to help teams identify bottlenecks and constrain the amount of work flowing through the system. Learn how to set WIP limits in Planview AgilePlace.
6. Class of Service
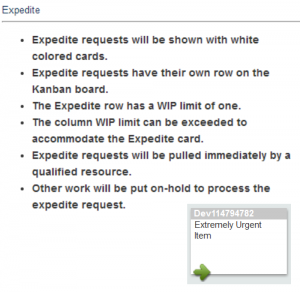
Class of service (CoS) is used in kanban systems to define a set of service levels based on the impact to the business. Common examples include expedite, date-dependent, regulatory, and standard.
Policies around priority and speed of flow are established for each CoS to help organizations manage the risk associated with the cost of delay. Planview AgilePlace makes the CoS associated with each work item clearly visible using colors or icons on the face of each kanban card. It also allows you to make the policy associated with each CoS category visible. To learn how to manage CoS policies in Planview AgilePlace, click here.
7. Board Templates
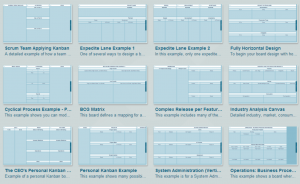
Using board templates for pre-defined business processes ensures greater consistency in the way work is executed across multiple teams in your organization. Planview AgilePlace provides an extensive library of templates for implementing a broad range of business and IT processes, including the Scaled Agile Framework (SAFe). Easily modify these templates or save your existing board design as a custom template. Click here to learn more.
8. Pre-defined Taskcards
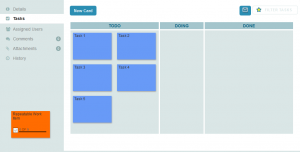
For repeatable work items, Planview AgilePlace lets you create pre-defined taskcards to ensure that the work is executed correctly each time. Identify the tasks that need to be completed and add them to the taskboard within the parent card. Duplicate as needed. Learn how to set up and use taskboards.
Enabling Continuous Improvement with Policies
Establishing team-driven policies is a key enabler of evolutionary, collaborative change. As the team evolves and grows, policies can — and should be — continuously revised and improved to reflect the current situation. Planview AgilePlace makes it easy to communicate these policy decisions to team members and stakeholders right within your Kanban board.


